Google
 

Monday, July 30, 2007

Plant Diseases, Horti-Hypochondria, and Pirates Named Blackleg

One of the first books I got when I started gardening was given to me as a gift. It was the Western Garden Problem Solver book put out by Sunset Magazine, and to this day, I'm not sure the gift-giver, otherwise known as "Mom," had any idea what fresh hell that book was going to bring the gift-recipient, otherwise known as her "certifiably crazy daughter."

That would be me.

Initially, I found the book kind of entertaining, in the same gross-out way I used to find my friend Danya's father's medical books when I was a kid. You know the books I mean -- the ones with all the pictures of grotesque skin conditions and swollen body parts and lungs with cancer and whatnot. The Western Garden Problem Solver book is essentially the gardener's equivalent of those medical books, complete with photos that make you want to barf and diseases with names that sound absolutely horrific in a rather delightful sort of way (to me anyway -- I loved being grossed out!): Blackleg, Fire Blight, Scab, Shot Hole, Slime Flux, Stripe Smut, or the particularly-ominous "Sudden Oak Death." (Incidentally, it is just me, or could many of these double as pirate names?)

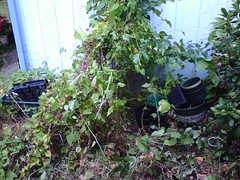
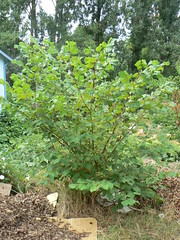
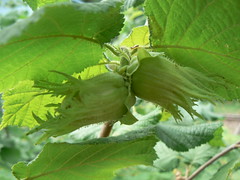
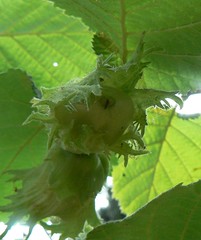
The more I looked through the book, though, and the more I poked around in my yard, the more unnerved I began to get. Pretty soon, I had turned into the gardening equivalent of a medical student, told to think horses when hearing hoofbeats, but thinking zebras every time anyway. Every plant in my yard suddenly had some elaborate, elusive disease. The roses had black spot and rust. The pears, I was sure, had necrotic leaf blotch. And my pink dogwood -- my favorite tree in the entire yard -- was suddenly dying right in front of my eyes from something called "anthracnose."

Despite the way it sounds, anthracnose is neither the latest al Qaeda threat, nor an extraordinarily bad 80's metal band. Instead, it's an utterly awful fungus that "causes considerable tree defoliation" and features "watery spots" with "spore masses" that contain "light pink slime."

In a word: ew.

Anyway, after finishing the book's chapter on anthracnose and then Googling the term for even more creepy information, I became utterly convinced my tree would never see another spring. Desperate, I finally broke off a small branch with infected leaves and took it into a master gardener friend of mine. Here's a transcript of our conversation:

Me: Look at this! [thrusts branch in friend's face] It's anthracnose, isn't it.
I KNOW it is. Oh god! My tree is dying of anthracnose!

Friend: [examines] Hmmm. This doesn't really look like anthracnose to me. In fact, it kinda looks like leaf scorch. How often are you watering this tree?

Me: [pauses, looks perplexed] You're supposed to water trees?

Well heck, people! Nobody ever told me that! I guess I just assumed for trees to have gotten that big to begin with in this world of sloth and iPods, they would've evolved out of the need for complimentary beverage service by now. I mean, honestly. My dandelions and blackberries never seem to need any water to flourish -- you're telling me trees can't do a better job than DANDELIONS and BLACKBERRIES? Whatever, man.

In any case, for the first six months I owned the Western Garden Problem Solver book, I showed up at my friend's door with all kinds of horrible-looking flowers and leaves, convinced every time I was single-handedly killing off every plant in my garden with some Smut or another. By the mid-year mark, she had started to roll her eyes before I even opened my mouth and finally gave MY disorder a rather apt moniker itself:

Yes, people, it's true -- the Western Garden Problem Solver (on sale at Amazon.com for only $4.99!) has turned me into a full-fledged horti-hypochondriac. Take two daisies and call me in the morning. And, my god, whatever you do, don't let the pythium root rot get you too.

Monday, July 23, 2007

Feed Me, Seymour!

Growing up with a mother who gardened taught me at an early age the pleasures of ripe tomatoes eaten right off the vine in the backyard on a sunny afternoon. There's just nothing like them -- not only the most perfect flavor and texture, but, warmed by the sun, the most perfect temperature too.

So, when I grew up and began living on my own, the first thing I wanted to plant was tomatoes. I lived in an apartment then, though, and while I tried for a few years to grow them in pots on my (pretty shady) balcony, I never really had any success. I'd get maybe three or four little cherry tomatoes total, and the plants would never get very big or healthy-looking.

I blamed the pots.


When we got our house with its lovely yard three summers ago, I knew, KNEW this was finally going to be it. I would finally have tomatoes in the summer right out of my backyard! Too eager to wait until the following year, I put three plants in immediately. It was mid-June by then, though, and, well, they did about as well as the apartment ones had.

I blamed late planting.

The NEXT summer, I planted on time, used fresh soil in the garden beds, and watered verrrrry carefully, convinced this would finally be the Year of the Tomato. My plants started out looking great, but they just never really grew and eventually kind of fizzled out completely.

I blamed the trees that got too big and shadowed that end of the bed.

Finally, THIS year, I decided to quit monkeying around and ask for some professional help. I talked to a master gardener at the nursery, and she convinced me to give pots another try. Heeding her advice, I bought three enormous black plastic pots (black plastic being best for developing really hot soil, she said), and I planted one plant in each one -- two cherry varieties, and one Roma. New soil, great looking starter plants, hot dirt (woo woo!), and the ability to move the pots into the most sunshiny-est spot in the whole yard. What could possibly go wrong?

Answer: gah, EVERYTHING! Weeks later, while we had a few little measley cherries coming in, the plants were still small and not very healthy looking. The Roma had barely grown at all and the other two were yellowing (a sign of too much water) and also browning (a sign of too little -- I give up!).

In defense of my wanna-be-green thumb, all the Seattlites I've talked to in the last month or so about this have said they've never had any success growing tomatoes up here either, despite the fact all of us have friends in Oregon -- not that far from here! -- who boast about having so many fresh tomatoes in late summer they eat their fill and STILL have plenty left over to pelt at Republicans (Portland is a very liberal town, for your non-Northwesterners). So, while I've been feeling really disappointed lately and about ready to throw in the towel on this dream for good, I also haven't been feeling all that responsible.

I blamed geography.

But you guys, guess what! Three weeks ago, in a last ditch effort, I bought a small box of Miracle Gro specifically designed for tomatoes (they'd been fed a more general "vegetable" blend earlier in the summer). I mixed 1.5 tablespoons into my large watering can (raising an eyebrow when I saw the mixture turn to pink foam -- I'm putting weird pink foam on my edibles??) and followed the instructions, which said to sprinkle it on the foliage first and then soak the soil. I closed my eyes, sprinkled, soaked, and refilled the can twice more with pink foam for the other two pots. And, a week later, I did it all again.

Last week, it rained here almost every day -- nearly breaking the record for the most rain we've ever gotten in July. I barely went out to the garden the whole time, as I knew nothing needed any watering, that was for sure. But yesterday, taking a break from an entire day spent with the new Harry Potter book and my sofa (Hi, Janet! Me too!), I went out to deadhead my limp, rain-blasted petunias, and . . .

H-O-L-Y C-O-W

The first thing I noticed was that the Roma looked a little bigger and kind of lopsided. Getting closer, I realized it was more like a LOT bigger, and was lopsided because it was covered in heavy green tomatoes!

And the two cherries! Both have begun to pop out of their cages, and one I actually had to stake with a large rake because I didn't have anything more appropriate that was tall enough! They are COVERED in dozens of tomatoes -- COVERED!

Do you guys remember that show Perfect Strangers and Balki's "Dance of Joy"? Yep, that was me in my backyard yesterday afternoon. Victory! It is so sweet! Almost as sweet, as a matter of fact, as MY MILLIONS OF TOMATOES!

Was it the plant food? Was it the heat wave followed by the monsoon? Was it just their time to go nuts? The pots? The soil? I have no answers. But I suddenly feel like a ballplayer on a winning streak who becomes afraid to change his socks lest the streak be broken. This combination may be the magic secret to growing tomatoes in Seattle!

So, if you live up here too and have longed to feel the sun-warmed burst of a ripe cherry tomato on your tongue, get some huge black plastic pots (I want to say ours are 8 gallons, but I can check if anybody wants me to), put one plant in each pot, use Miracle Gro for tomatoes, place in direct sun, water too much AND too little at the same time (good luck with that one), sacrifice a live goat, cross your fingers, and do a rain dance in mid-July.

Let me know if it works for you too.

p.s. I was kidding about the goat.

Sunday, July 22, 2007

Poisonous plants at Hogwarts

(image from europealacarte on Flickr, used under Creative Commons license)

Unless you've been living under your mulch with the slugs for the last year, you know that this is Harry Potter weekend. The seventh and final tale, Harry Potter and the Deathly Hallows, came out yesterday, which means that one of your trusty bloggers (that would be me) spent a perfectly good weekend gardening day lounging on the couch reading. Today, having finished the book (don't worry--you'll get no spoilers from me), I'll get back to work. But first, let's visit the Hogwarts garden!

(image from roger on Flickr, used under Creative Commons license)

Today's Oregonian has an article in the travel section on the garden at Alnwick Castle, which serves as Hogwarts for the Harry Potter movies. About half of the article is devoted to the Poison Garden, which features a hissing copper snake, Schedule 1 narcotics, deadly nightshade, hemlock, and lots of other fascinating but toxic plants. The article includes an important point for all of us gardeners to remember:


Alison Hamer, the garden's learning and development manager, said visitors are often surprised to realize that they have many of the poison plants, such as foxglove and azalea, growing in their own backyards. Others can easily be found in the wild. And they are as easy to grow as weeds.


I remember getting into an e-mail discussion with someone on PDX Plantswap once about poisonous plants. She was afraid to grow daphne, because she had young children. I certainly wouldn't question someone's decision to keep their children safe, but I did gently remind her that many of our common garden plants are poisonous, including tomato vines and the aforementioned azaleas. So unless you're willing to rip up most of your landscape, there's no substitute for teaching children at a young age not to eat anything in the garden that they don't recognize. My son likes to graze on fresh herbs, especially mint, so he got taught this lesson early. I point out the especially poisonous plants (like the castor bean growing on my deck), but he never touches anything he isn't sure is OK.

I know there are children who will put anything in their mouths, so whether or not to grow poisonous stuff must be an individual decision. But my point is, even if you avoid the infamous ones like castor bean and foxglove, there's probably still something toxic in your yard. And we don't want to discourage children from hanging out in the yard, because we want them to mow the lawn when they're older, right?

Stepping off my soapbox to return to the Alnwick Castle garden:

And if any of you readers out there are planning a trip to Alnwick Castle, may I stow away in your suitcase?

Wednesday, July 18, 2007

An Introduction to Meg, Your Newbie Garden Blogger

Hello, Rainy Day Gardening readers! Janet and I recently met via email when we got started on a library-related topic and quickly went off on a tangent about plants. After a few back-and-forths, she asked me if I'd like to write for her gardening blog, and I said I'd have to think about it, waited approximately 4.2 seconds, and then said I'd LOVE to!

A little bit about me: I'm a substance abuse/addictions librarian living in Seattle, Washington. My husband and I bought our first house three years ago and as it had an utterly spectacular yard, I took up gardening. The first summer was a bit of a wash in terms of actual planting -- we moved in in June and I wanted to see what the previous owner had put in before making any radical changes. That winter, I read lots of gardening books and tried to learn as much as I could before spring. And that following summer, I quickly learned there's a whole lotta stuff about gardening they don't tell you in the books.

A few examples:

1. Running both the front- and backyard hoses at the same time you do a load of laundry means you can't flush the toilet.

2. Just because it was sunny on that spot in the yard LAST summer does not mean it'll be sunny there NEXT summer (darn trees!).

3. On the 8th day, God created blackberries. And when He saw what He had done, he snorted at Adam and Eve and said, "Suckers."

4. If you pull out fifty dandelions in the "yellow flower" stage and leave them in a heap on the side of the yard for three days because you are too lazy to put them in the yard waste bin, they will continue to develop to the "puff ball" stage, and soon, all your hard work, sweating, and inappropriate language will have been for naught.

5. Slugs can climb up the sides of pots. And I am also pretty sure they can fly, despite physical evidence to the contrary.

6. Peas are fun and relatively idiot-proof (for evidence, see photo above).

My gardening posts here will primarily focus on mistakes I have made, things I've learned (usually the hard way!), and triumphs I may or may not experience, depending on soil quality and weather conditions. I hope you readers will enjoy getting our two perspectives on gardening: Janet's, a seasoned veteran, and mine, a total rookie. Please comment freely and vigorously on any and all of my posts -- I will surely need as much advice and coaching as possible!

My camera is currently on the fritz (as are my zinnias -- coincidence?), but I hope to include more photos of my garden in future posts. Stay tuned!

Monday, July 16, 2007

Old mess becomes new compost heap

You know how there's an area in almost every garden that's a big ol' mess? You avert your eyes as you walk past, because you don't want to see it, but you don't want to deal with it either? Well, I have a lot of those in my yard, but I now have two fewer than I did a couple days ago. Big Mess #1 was an area about 7' x 4', which contained a huge dead rhododendron, a volunteer poplar seedling, a bunch of bindweed, and my mother's collection of old nursery pots. I've had my eye on the space for a couple years as a place for a Nelly Moser clematis and some other pretty flowers, but I just didn't want to deal with the mess. Take a look at this pic to see why:
Before the sheet mulching project

Saturday, however, I decided I'd had enough. With a little help from Husband, who yanked up the rhodie skeleton and poplar seedling, I had the area cleared in about a half hour. Then it was time to employ my favorite lazy gardening technique, sheet mulching (see my previous posts on that topic for more info on that technique). Down went a thick layer of newspaper, followed by two big bags of leaves left over from last fall. Here's a pic of the project in progress:
During the sheet mulching project

Since I plan to convert this area to a planting bed next spring, I need to improve the soil. I have also filled all three of my compost bins, so I was on the lookout for a place to start another compost heap. Hey, I thought... let's solve both of those problems! The site of the former Big Mess #1 is now home to my newest compost heap! And just in time, too, because today Son and I decided to tackle Big Mess #2, the huge strip of horsetail growing along the west side of our property. All that horsetail, along with some other weeds, is now rotting away in its new home:
0716071511.jpg

So what's the point of this story (besides a little public bragging about how much work I did this weekend)?

  • Sometimes those big garden jobs that we put off really aren't that big. It took me a whopping 30 minutes to clear out that mess. Why did I wait so long?
  • You don't have to spend a lot of money or do a lot of digging to get a new area ready for planting, especially if you're willing to wait awhile for nature to do the work.
  • Make composting as easy as you can. Why haul the debris to the pile, then haul the finished compost to where you need it? Either pile up your debris near where it originally grew, or build your pile where you're going to need compost in a few months.


Happy gardening!

Sunday, July 15, 2007

My hazelnut tree is expecting!

P1030092

My hazelnut tree, which I raised from a seedling, finally has nuts on it! There are only two of them, but I'm still excited. Every year for the last few years I've checked the tree for signs of nuts, only to be disappointed--and now it finally has some. Here they are--aren't they cute?

P1030094

This pic shows the immature nut inside the husk:
P1030096_cropped

Where I live used to contain a hazelnut orchard many years ago (or so the neighborhood old-timers tell me), so there are lots of hazelnut trees in the area. The squirrels bury the nuts and forget to eat some of them, so they sprout, and we end up with lots of hazelnut seedlings in the yard. I decided to keep a couple of them, one male and one female. The male has been producing catkins for several years, and now the female is finally reproductive age too. Yay! My hazelnuts have reached puberty!

Hazelnuts are very easy to grow, though it can be a challenge to find trees for sale or even to find information on growing them. A Google search turned up a few links with information, including these two:


Neither gives clear growing instructions, so I'll include some here.

Growing conditions
Hazelnut (a/k/a filbert) trees are understory trees, so they can tolerate some shade. Mine grow in anywhere from nearly full sun to half shade. They're extremely low-maintenance, requiring little to no supplemental water here in Portland. They appreciate a little fertilizer but don't require it. They seem fine with our local heavy clay soil, though I mulch mine with compost and fall leaves.

Males and females
A male and female are required for nuts, and only females produce nuts (I'm sure there's a joke in there somewhere, but I'm not going to search for it). As long as there's a male tree somewhere in the area, the female should bear. I'm not sure how close together they need to be; mine are about 40 feet apart, but I don't think they need to be that close. When they are seedlings, males and females look the same. After a few years, males will start producing catkins (sort of furry, worm-like things, about 2-3" long--there's probably a joke in there somewhere too) in late fall. These will hang on the bare branches throughout most of the winter. I don't have any pictures of my male hazelnut, but there are a few good ones on Flickr, including this one.

Getting trees
As for finding trees... good luck. Until recently, it was illegal to sell hazelnut trees in Oregon or ship them to Oregon, because of efforts to control Eastern Filbert Blight. The ban was lifted a couple of years ago, when attempts to control the disease proved futile. The change wasn't well-publicized, however, so most nurseries still don't sell them. So how do you get one?

  • If you know someone with a filbert, you can ask for a sucker from it (they spread into thickets).
  • If you live near filbert trees, you'll probably end up with seedlings in your yard, but you may mistake them for weeds, as I used to. A Flickr seearch on hazelnut leaves turns up some pictures that can help you recognize baby trees. If you aren't sure, gently dig up a likely candidate and check the roots for the remains of the hazelnut. If the seedling is small (less than about 12" tall), part of the nut should still be there.
  • If you don't want to go to all this trouble, leave a comment with your email address, and I'll make arrangements to send you some seedlings. I have several in my yard that I need to dig up.
  • Finally, you can grow your own from fresh, raw hazelnuts. Just bury the nut and wait. But be patient. My female filbert is about 6 years old, and it's just now starting to produce nuts.