Google
 

Friday, March 08, 2013

Check out Erin's new garden blog!

My friend Erin just started a blog for her garden!  Surf on over to Windfall House Potager and check it out!  Hmm... do gardeners surf... or dig?  Anyway, I dig her blog, and I hope you will too.

Sunday, March 03, 2013

I used to have money; now I have trees!

Ah, spring: when flowers bloom, sun shines, breezes blow... and bare root trees go on clearance sale!  Your rainy day gardener is deep in the throes of spring plant lust and went on a major shopping spree this weekend.  I'm now the proud owner of a Manila mango tree, four blueberries, a Peace rose, and an Early Girl tomato, plus four (yes, four!) bare root fruit trees on sale at Orchard Supply Hardware for 50% off.  That's about $9 per tree, folks!

Look left for pictures of my discount booty (hmm... maybe I shouldn't phrase it quite that way..."discount booty" suggests a different kind of sale--one likely to result in a trip to the local health department for an antibiotic).  Anyway, here's what I scored for half price at OSH today:

  • A Snow Queen nectarine
  • A Goldmine nectarine
  • A Red Baron peach
  • A Twentieth Century (Nijisseiki) Asian pear
I think I officially have an orchard now, as the new trees will join 3 large orange trees, a large lemon tree, a peach tree (I forgot the variety), an ultra-dwarf nectarine, an Indio mandarinquat, 2 kumquats, a blood orange, a tangerine, a Meyer lemon, a Mexican lime, a Hachiya persimmon, an aprium, 2 apricots, a pluot, 4 apples, and an All-in-One almond.  I need a twelve-step program for tree addicts:

"Hi, I'm Janet, and I'm addicted to fruit trees."
"HI, JANET!"
"Today I binge-planted 4 trees in a row.  I can't pass a tree display in a store without stopping, and sometimes I just stand there, looking at the display with glazed eyes, drooling.  And last week, I went tree-shopping before lunch.  I staggered home to my family late in the afternoon, with a truckload of trees and an empty bank account."
"Here's your membership card."

Now, does anyone know where I can get an Asian pear, cheap?  My new one needs a pollinator. 

Saturday, March 02, 2013

Spring is springing!

I love Saturdays in springtime!  Yep, it's spring down here in Smogville.  It was above 80 today, clear and perfect.  And, our orange trees are blooming, so the entire backyard is perfumed with citrus blossoms.   I celebrated this delightful day by massacring the crabgrass in my backyard.  It was the horticultural equivalent of an 80s slasher flick, except it was too hot to wear a hockey mask, and I used a shovel instead of a machete.

I was too busy committing mass murder to take any garden pics, but I have a few from a couple of weeks ago.  Here's our peach tree in full bloom:


I don't know why more people don't plant fruit trees instead of ornamentals.  This tree is definitely pretty enough for the front yard, as lovely as any dogwood or flowering plum--but it also makes tons of yummy peaches.  Here's a closeup of some flowers:
See?  Every bit as gorgeous as the purely ornamental trees.

Speaking of ornamental, here's our Indio mandarinquat:
As you might guess, a mandarinquat is a cross between a mandarin and a kumquat.  It makes good-sized, teardrop-shaped fruit that you eat like a kumquat, rind and all.  My husband loves them.

OK,back to the flowers.  Here's our Dorsett Golden apple, happily blooming away:

And now for something completely different... My husband just wandered in and did an impression of manure spreading as line dancing to a Billy Ray Cyrus song (you don't really have to ask which one, do you?).  I really should change the name of this blog to Gardening in Absurdia, because that's definitely where I live.

Happy spring from your absurd rainy day gardener!

Friday, February 08, 2013

Our snow day has been cancelled

Not exactly garden-related but too funny not to share.  How I know I live in Southern California: I just got an email from Glendora Community  Services with the subject line, "Snow Day Cancelled."  Bewildered, I opened the email.  The first sentence: "Snow City has been cancelled due to weather."  For those of you who aren't Californians and are therefore very confused, Glendora schedules a snow day every year, for which they bring in a snow machine to make snow so kids can play in it.  I tell ya, you just can't make this stuff up.  Maybe Portland should schedule an annual Sun Day and rent a sun machine.  I'm picturing a giant tanning bed...

Saturday, October 20, 2012

Squash time part 3: the devouring (a/k/a what to do with pureed pumpkin and winter squash)

yummy pumpkin pancakes....naked
Pumpkin pancakes, photo credit Flickr user Rice and D, CC licensed
In our last episode of our little squash horror story, we butchered, cooked, and pureed our winter squash/pumpkins.  Now that we all have a freezer full of squash puree, let's talk about what to do with it.  First I'll share some recipes, then I'll talk about pumpkin or squash as pet food.

Squash for humans
The easiest thing to do is to Google your favorite pumpkin recipe.  You can substitute squash puree for pumpkin in any recipe.  Most recipes will call for canned pumpkin, which is usually a little thicker than homemade, frozen puree, so you may want to cut down the amount of water or other liquid you use in the recipe or let your puree drain a bit before using it.  Just experiment to see what works for you.

If you need some ideas for recipes, here are a few of my favorites:
  • Pumpkin pancakes and pumpkin waffles - my husband and son both love these
  • Pumpkin bread - Google around for a recipe that looks good to you
  • Pumpkin cookies
  • Pumpkin pie - of course.  Again, Google around for a recipe that looks good to you.  
  • Pumpkin gnocchi.  I've only made this once, and I think I added too much flour, but they were still yummy with browned butter and crispy sage.
  • Pumpkin cheesecake - I've had it in restaurants but never made it.  Maybe I'll try it this year. 
My friends rave about pumpkin soup, so you could try that too. 

Squash for dogs and cats
Pumpkin or other winter squash can make a great addition to your dog's or cat's diet.  Note: I am not a veterinarian!  I will share my experiences with squash as pet food, but please check with your vet about your pet's specific needs before adding anything to his/her diet. 

First, the felines: We used to have a very fat cat named Ted who would eat everything and was beginning to resemble a furry beach ball.  Our vet advised us to replace some of his cat food with pumpkin, because it's low in calories, and some cats love it.  Unfortunately, our otherwise gluttonous feline didn't like it, but if yours does, go for it. 

Now, the canines: We have two retired racing greyhounds, Fritz and Fergi.  Fritz has colitis, which means that he gets bloody diarrhea periodically along with the smelliest farts on the face of the earth.  The head of our local rescue group recommended pumpkin as a good source of fiber, which might help alleviate these attacks.  We add a couple of dollops of pumpkin puree to his food, and it really does help.  Some dogs love pumpkin and will eat it by itself, but Fritz will only eat it if we stir it into his food.  

On a side note, when we ran out of pumpkin this spring, we tried shredded zucchini, since it has nearly as much fiber.  It seems to work even better.  So if you have a dog with gastrointestinal issues, you can try shredded zucchini in the summer (when it's fresh from the garden) and pureed pumpkin from your freezer the rest of the year. 


Wednesday, October 17, 2012

Squash time part 2: the butchering (a/k/a How to cook and puree winter squash the mostly easy way)

In a post last week, we talked about winter squash (including pumpkins)--weird, warty, wonderful winter squash (including pumpkins).  Hopefully by now you've all come to share my obsession and have acquired a storage shed full of squash.  So go get a few; it's time to butcher 'em, cook 'em, and puree 'em.

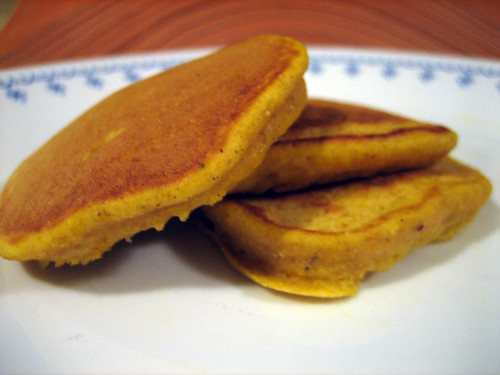
Why, you ask, are we murdering innocent squash?  Simple--because they're delicious!  Our goal will be pureed squash, which can be used in lots of ways, which we'll explore in our next post.

Let's get started!  You will need:
  • A pumpkin or other winter squash (or 2 or 10 depending on the size of your oven and your squash).  Note: you can use pumpkins and winter squash interchangeably in recipes, but you'll get the best results with winter squash or cooking/pie pumpkins.  The big jack o'lantern pumpkins can be a bit stringy or watery, and they don't always have the nice orange color we expect from cooked pumpkins.  But you can use them if you want.
  • An oven
  • A big ol' Norman Bates Psycho knife (any large, sharp kitchen knife will do)
  • A smaller, sharp paring knife
  • A baking sheet
  • Some foil
  • A fork
  • A blender or food processor
  • Freezer containers or bags
First, wash your squash (hey, that has a nice rhythm to it...).  You want to remove any dirt or other gunk, so you don't get your baking sheet all dirty.  Then line your baking sheet with foil to make cleanup easier.

Now, put your first victim...er, I mean squash, on a solid surface like a kitchen counter or cutting board, and cut it into pieces.  The smaller the pieces, the faster they'll cook, but cutting squash is hard work, so bigger pieces are easier.  Here's what mine usually look like: 

Put the pulp and seeds in a big bowl.  We'll come back to that. 

Put the pieces cut side down on the foil-lined baking sheet.  Why cut side down?  Because if you put them cut side up, they'll develop a leathery coating on the outside that won't make a nice, smooth puree. 

Cut as many squash as your baking sheets and oven will hold.  I cook two baking sheets at a time, because I have two oven racks.  

Set your oven for 350F and bake the squash for about 90 minutes, then check to see if it's done.  How do you check to see if it's done?  You stab it with a big fork!  (C'mon... What did you expect?  A gentle stroking?  This is my blog after all.)  If it's done, it will be very tender.  If it isn't very tender, cook it awhile longer, stabbing it every 20 minutes or so till it's done. 

When the squash is done, take it out of the oven and let it sit till it's cool enough for you to touch.  You can leave it out overnight if you want; just cover it with a towel so no dust or gnats get on it.  

Once it has cooled, grab your paring knife, peel the squash, and cut it into small chunks.  Throw the chunks into a blender or food processor and puree till smooth.  

Package the puree for freezing and (of course) freeze it.  I usually use canning jars for freezing, but you can use freezer containers or freezer bags.  I usually package my squash puree in pints, because most recipes only call for a cup or two of pumpkin/squash.  If you want to freeze your puree in recipe-sized amounts, you can put a cup of puree in a sandwich bag, then put the sandwich bags in a gallon freezer bag.  But that uses lots of plastic, which is a bit wasteful unless you wash and reuse your bags.  

That's it!  

But wait!  What about the seeds?  Squash seeds can be cooked just like pumpkin seeds, and they're just as yummy.  Everyone seems to have their own favorite method for roasting pumpkin seeds; just search online if you need ideas. 

Sunday, October 14, 2012

Welcome, monarch caterpillars!

I've been growing milkweed (Asclepius for those who like their botanical names) since we moved into our house two years ago, hoping that some hungry monarch butterflies would stop by, chow down, and lay their eggs.  But alas, no monarchs ever found my monarch fast food joint.  Today, however, my husband rescued an injured native bird, which we took to Wildwings. The folks who run Wildwings had a patch of milkweed near their front door, practically covered in monarch caterpillers.  When they found out I have milkweed, they gave me four of the cute little guys, which have now settled into their new dining hall.  You can see them in the lower part of the picture above.  Aren't they adorable?

For those who don't know, monarch butterflies are gorgeous orange and black butterflies, some of whom migrate thousands of miles every year.  When I was a kid in California's Central Valley, they were common as dirt, because milkweed (the only food their caterpillars can eat) was common as, well, a weed - because that's what it was.  Now that so much land has been built on here in CA, milkweed isn't so common, and the magnificent monarch is much more rare.  Home gardeners can help by planting milkweed, so monarchs will have a place to lay their eggs, and their babies will have something to eat.

You can learn more about monarchs at monarch-butterfly.com or, for kids, a neat page on Kidzone about monarchs.  If you want to grow milkweed, you can buy seed on Amazon or EBay.  I got mine from Renee's Garden Seeds.  Just go to this page and scroll down to Asclepius.

Here's one more pic, a closeup of one of our caterpillars.  I hope he inspires you to plant some milkweed next spring.

Sunday, October 07, 2012

Squash time!

Marina di Chioggia (front) and Galeux d'Eysines heirloom winter squash
Ah, fall: time for the leaves to turn color (but not here in SoCal), the temperatures to drop (but not here in SoCal), and your Rainy Day Gardener to become obsessed with... winter squash!  We love pumpkins and other winter squashes here at RDG headquarters, and we use them for all sorts of things: fall decor, demented-looking jack o'lanterns, baking, and even dog food (yes, really).  Let's take a look at the many pumpkin possibilities.

Growing them
It's a bit late to plant pumpkins, unless you live in Australia.  But you can start planning for next year.  Anyone can grow a plain o'l orange pumpkin, but we like to be creative.  I first got inspired to grow weird squashes (remember: a pumpkin is just a big winter squash) by Amy Goldman's beautiful book, The Compleat Squash, which I reviewed several years ago:


Now I grow all kinds of funky things, as you can see from the picture at the beginning of this post.  For some reason, I love funny-looking, warty squashes.  If you'd like to grow something besides a plain orange pumpkin, try one of the many heirloom seed vendors, like Baker Creek Heirloom Seeds.  Just take a look at their winter squash selection: lots of warty, funky goodness!

My husband's giant pumpkins.  For him, bigger is always better.
My husband also grows giant pumpkins, which look cool but are a pain to move without a forklift.  We don't do anything special to make them really huge, so ours won't win any prizes.  But if you want to grow the biggest pumpkins in town, check out BigPumpkins.com.

If you didn't grow any pumpkins or winter squash this year, don't despair: 'tis the season when pumpkin patches, vegetable stands, and even supermarkets begin stocking various winter squashes, including some weird (and even warty) ones for fall decor.  Some pumpkin patches even sell giant pumpkins, in case you want to impress your neighbors without breaking your back.

The great thing about pumpkins and other winter squash is that they do double duty: they look great on your porch in the fall, and they taste great on your table afterward.  If you have some now, you'll want to keep them someplace fairly cool, so they don't rot too soon.  If you live in the northern part of the country, you can probably leave them outside, as temperatures should be starting to drop (right?).  Just bring them in if there will be a hard freeze.  If you live down here in Hell's Half Acre... er, I mean Southern California, you may want to keep them in your air-conditioned house for a few more weeks.  Did I mention it was 104F last weekend?  Ugh.

One more tip: if you don't mind plain pumpkins, you can often get them free after Halloween, either from pumpkin patches or grocery stores or from your neighbors who didn't carve theirs.  Most jack o' lantern pumpkins aren't as good for eating (they don't all have that rich orange flesh, and some can be a little stringy), but you can eat them, or you can use them for dog food like we do. 

In a follow-up post, we'll talk about what to do with your weird, warty wonders after Halloween/Thanksgiving/whenever you're tired of looking at them.  We'll butcher 'em, cook 'em, puree 'em, and eat 'em or put 'em in the freezer. It'll be like a squash slasher flick!


Saturday, September 15, 2012

The shovel...

Just spotted on Orchard Supply Hardware's Facebook feed:
The shovel was an invention that was truly ground-breaking.
Hey, watch it--those rotten tomatoes hurt!

Friday, September 14, 2012

Salad days

Mesclun mix
Photo courtesy of Flickr user randomduck via CC license
One of my co-workers recently asked me about growing salad greens, because her daughter loves interesting salads and wants to start growing her own food (yay!).  So I started thinking about tips for novice lettuce growers and decided to summarize my advice here.  

Salad greens are a great crop for beginning gardeners, because good salad greens are expensive to buy but easy to grow.  All you need is a little space (even a wide pot or two) and a somewhat sunny spot.  Most US gardeners should start planting lettuce in late winter or early spring (depending on your climate), but here in SoCal (and other warm/mild climates), you can start lettuce seed now for a fall and winter crop.  For those of you who don't live here in the land of movie stars and swimming pools, keep in mind that most lettuce can take a light frost, but a hard freeze will be the end of your crop. 

OK, enough preamble--let's get this salad started!  You can start lettuce from seed or buy plants at the nursery, but starting from seed is cheaper and will give you more variety, especially if you buy a packet of mixed seed, usually called mesclun.

Note for newbies: What the heck is mesclun?  Glad you asked!  According to that great gardening oracle, Wikipedia, mesclun "is a salad mix of assorted small, young salad leaves which originated in Provence, France."  Hmph.  That's what Wikipedia thinks. My mesclun originated in my backyard. 

Anyway, mesclun mix is a great choice for beginning salad gardeners.  One packet of seed will give you  a bunch of different kinds of greens (and reds and purples), and you can grow it in very little space--even in containers.  You can pick up packs of mesclun seed at most garden centers, or you can order from Amazon: 


Just plant according to the directions on the seed packet, water well, and keep the ground evenly moist while your crop grows.  

Here are a few tips for growing mesclun--or any other salad greens: 

  • Plant a small patch of salad greens about every two weeks during the planting season rather than a whole bunch at once.  Otherwise, you'll have about three weeks of Paul-Bunyan-sized salads, after which you'll be stuck with your usual diet of beer and Cheetos.  
  • Use some fertilizer. You can use just about any balanced fertilizer (ask for advice at your local garden center), or you can use manure.  Safety tip: Follow directions on the fertilizer package for use with edible crops.  You don't peel or cook lettuce--only rinse it--so you want to be sure that whatever you use is safe.  
  • Protect your salad patch from marauding animals.  You don't want cat or dog poop in your salad!.  And if you have dogs who like to dig holes to China (I'm looking at you, Fritz and Fergi), be sure to put some barriers up to discourage their excavation.  I'm still finding lettuce seedlings in odd places, thanks to my darling greyhounds (the aforementioned Fritz and Fergi), who dug a huge hole in my salad patch the day after I planted the seeds.  *sigh*
  • Use some kind of snail and slug killer.  Our dear terrestrial mollusks love salad. Be sure to choose the kind that's safe for kids and pets if you have any two- or four-legged critters in your family. 
  • Dealing with insects: Some insects love salad too.  I don't use pesticides on my lettuce, so I occasionally find critters when I harvest.  See the paragraph on harvesting, below, for tips on debugging your lettuce.
  • Weed regularly.  You don't want to harvest weeds accidentally with your salad, especially since some weeds are poisonous. 
Once your plants are a few inches high, you can start harvesting.  Snip some leaves with scissors, leaving at least a couple on each plant, so the plant will keep growing.  Once your plants are growing well, you should be able to harvest weekly. Try to harvest in the morning or evening or get them inside quickly, so they don't wilt in the heat.

The next step is to wash the harvested leaves.  As I mentioned above, you may find insects on the leaves.  To make sure you don't accidentally feed your family bugs (and thereby guarantee they'll never eat homegrown salad again), try immersing freshly-harvested leaves in a bowl of cold water.  Swish them around gently, then pour off the water.  Repeat a few times, till the water is clean, and you don't see any creepy crawlies in the water.  Drain, tear into salad-sized pieces, and either dry (gently) between towels or spin in a salad spinner.  Also, please keep in mind that homegrown produce--especially if it's grown without pesticides--won't look as perfect as the stuff you buy in the supermarket.  Your lettuce leaves may have a few holes, and you may have to wash off some bugs and dirt.  But at least you won't have to wonder what kind of chemicals are lurking in your salad. 

Now all you need is a good dressing, and you'll be ready to serve your salad.  You can buy bottled dressing, but why smother your beautiful homegrown greens in preservatives and artificial colors?  Instead, try making your own dressing.  You can find recipes for almost any kind of dressing online.  Here are a couple of my favorites: 
As the weather warms, your lettuce will start sending up seed stalks, a process called bolting--which always makes me picture my lettuce running for its life, while I chase it through the yard, wielding kitchen shears and cackling maniacally.  Yes, I did watch too many slasher flicks in the 80s.  Anyway, once your lettuce starts to bolt, it will start to taste bitter.  At this point, you have two options: pull up the plant and compost it, or leave it and let it go to seed.  If you let it go to seed, wait till all the seeds have ripened and fallen before pulling the plants up.  Wait till the summer heat passes, then start watering your salad patch, and the seeds should germinate, starting the process over.  Note: reseeding may or may not work for you, depending on your climate.  But it can be fun to try, and it will give you a good excuse to leave the plants alone till the end of the summer rather than going to the effort of pulling them up.  You aren't lazy--you're thrifty!

Sunday, August 26, 2012

An apple infographic

Sorry to be incommunicado for so long.  I and my plants have been wilting in the August heat here in SoCal, and I'm recovering from surgery, and those are my excuses for slacking on the blogging front, so deal with it. 

Anyway, I just ran across this great infographic in my Facebook news feed and thought I'd share it here.  My source got it from the Engine 2 Diet Facebook page, but I have no idea where it came from originally.  It's a handy guide to common apple varieties.  I wish they'd included some of the non-commercial varieties that appear in home gardens, but then it would be more of a billboard than an infographic.

Sunday, July 22, 2012

Today's garden recipe: bruschetta with homegrown tomatoes and basil

Breaking news: we have ripe tomatoes!  We've had cherry tomatoes for a couple of weeks now, but we didn't get our first full-sized tomato till a couple of days ago.  Now we can have fresh tomato sauce, thick slices of tomato on burgers, margherita pizza, and today's afternoon treat: bruschetta.  A couple of weeks ago, I had a wonderful heirloom tomato bruschetta at Pop Champagne Bar in Pasadena and decided I'd make it at home as soon as I had ripe tomatoes.  I didn't exactly duplicate Pop's recipe, but it was still pretty good.  Here's what I did; feel free to adapt to your own tastes.  Garlic lovers may want to add some fresh minced garlic to the tomato mixture.

Janet's fresh tomato bruschetta
  • Fresh tomatoes, seeded and chopped (I used 2 large red ones and 3 medium green zebras; just use whatever you have)
  • Olive oil to taste (I used only a tablespoon or so, because I'm not a big fan)
  • Balsamic vinegar to taste (I used about 3 tablespoons)
  • Sliced fresh basil (I used about 7 big leaves, rolled up and cut into strips with kitchen shears)
  • Salt and pepper to taste
  • Baguette slices (I used whole grain, presliced and bought for $.99 from the reduced for quick sale rack at Ralph's)
  • Butter or olive oil
Mix the tomatoes, olive oil, balsamic vinegar, basil, salt, and pepper and set aside.  Brush the baguette slices with olive oil or melted butter and toast under the broiler.  Turn when brown on one side.  Caution: mine started to burn in less than a minute, so stay close to the stove and check them every little bit. 

Serve the toasted baguette slices and tomato mixture.  People can spoon tomato mixture on a baguette slice just before eating.  That way the bread doesn't get soggy.  

Sunday, June 10, 2012

This week's garden recipes: fennel slaw and peach sorbet

One of the best things about growing edible things is, well, eating them.  Since I'm a glutton, I really get into the eating part of edible gardening (maybe I should rename this blog Gluttonous Gardening).  Our summer harvest season is just getting started here in SoCal, and we're already feasting.  Here are my two favorite recipes from the past week of harvesting and cooking (to respect copyright, I'm including links rather than the whole recipe):

  • Fennel Slaw with Mint Vinaigrette: I'm growing fennel for the first time ever this year, so when I realized the bulbs were fat and ready, I had no idea what to do with them. A little Googling turned up this recipe, which turned out wonderful!  Even my "it's only worth eating if it comes from the drive-thru" husband and my "it's only worth eating if it has enough sugar to make an elephant diabetic" son liked it.  Yes, for real: my 13-year-old liked a fennel salad.  It really was delicious, especially after it had sat in the fridge for about a day.  The extra time mellowed the flavors a bit.
  • Peach sorbet: Our peach tree is loaded this year, so I'll be having fun finding stuff to do with peaches (it's a tough job, but someone has to do it).  We bought an old ice cream freezer at a yard sale a few years ago and (finally) tried it out.  Neither of us has ever made ice cream before, but with a little pampering of the ancient ice cream maker, we succeeded in making the most wonderful sorbet I've ever eaten.  This is a very simple recipe from the Food Network - basically peaches and sugar.  The result tasted like a creamy, frozen version of a fresh peach.  Absolutely divine. 
Lest anyone out there think I'm a health nut, I've also had fun cooking up green beans with lots of bacon.  Once I've perfected my beans-to-grease ratio, I'll post a recipe here.  

Sunday, May 13, 2012

Got extra garden produce? Help feed the hungry!

Many of us are busy getting our vegetable gardens planted, so it's a good time to think about how much we're going to grow, and what we're going to do with it all.  I don't know about you, but I almost always grow more produce than my family can eat.  I can, freeze, and dry, but there's usually still too much.  So this season I resolve to donate some of my surplus to a local food pantry to help feed the hungry.  I used to do that when I lived in Oregon, and it was a great feeling to know that my hobby could help improve someone's life.  (It was also a great justification to buy too many seeds and plant too many vegetables.  I'm not obsessed; I'm philanthropic!)

Anyway, there's now a web site to help me and other gardeners find a local food pantry: Ample Harvest.  Click on Find a Pantry and enter your zip code to get a Google map showing nearby food pantries, along with email and phone numbers.  Information is entered by the pantries themselves, so hopefully it's accurate.  I just typed in my zip and discovered a food pantry just a few blocks away.

If you want to get other gardeners involved in donating produce, you might consider starting a Plant a Row for the Hungry campaign.  Plant a Row for the Hungry is a public service program of the Garden Writers of America.  As a campaign coordinator, you work with gardeners and local media to coordinate donations of homegrown produce.  And for those of you who like to cook what you grow (that would be all of us veggie gardeners, right?), there's a Plant a Row for the Hungry cookbook with some yummy-sounding recipes.

So how about it, gardeners?  Let's share some of our bounty!